
Yolact 可以圈選出不規則型狀的物件, 追求的是運行速度,目前沒有任何一個物件偵測模型可以超越 Yolact 的速度與準確。
Yolact 參考 SSD 和 YOLO 的概念,將原本 two-stage model 變成 one-stage model 進行加速,這就是 Yolact 提升速度的主要原因。
請注意,Yolact 只能使用 nVidia 顯卡訓練模型,不能使用 CPU 訓練。所以沒有外接顯卡就無法操作。
練習素材
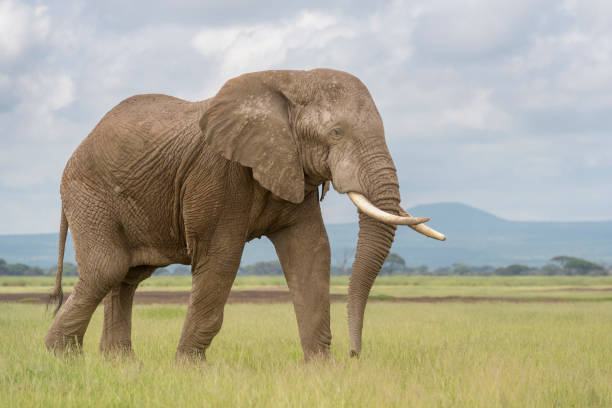
在此提供要訓練的圖片及 .json檔,共有 cat, dog, elephant, pig, tiger,每種動物各四張圖片,並提供已訓練完成的模型。
訓練圖片 yolact_images.zip : 解壓縮後,置於 data之下。
已訓練好的模型 : yolact_base_3999_8000.pth , 請置於專案weights之下。
偵測圖片 :
python所需套件
Yolact 1.2 的環境設定檔 environment.yml 有說明需使用 python 3.7 的版本,但經測試 python 3.8 也沒問題,只是需注意 numpy 只能使用 1.21.6 版,所以需先安裝 numpy 1.21.6 版,再安裝其它套件。
pip install numpy==1.21.6 imgviz labelme pycocotools pyqt5 opencv-python
pip install torch==1.10.0+cu113 torchvision==0.11.1+cu113 torchaudio===0.10.0+cu113 -f https://download.pytorch.org/whl/cu113/torch_stable.html
下載 yolact 原始碼
首先使用pycharm 開啟新專案,然後到 github https://github.com/dbolya/yolact 下載yolact程式碼,解開後,將裏面的所有目錄及 *.py copy 到專案之下。
下載官網COCO權重
下載網址如下 : https://drive.google.com/file/d/1yp7ZbbDwvMiFJEq4ptVKTYTI2VeRDXl0/view?usp=sharing
下載後,請將 yolact_resnet50_54_800000.pth 置於專案中 weights目錄之下
偵測圖片
使用如下指令偵測圖片
python eval.py --trained_model=weights/yolact_resnet50_54_800000.pth --config=yolact_resnet50_config --score_threshold=0.3 --top_k=100 --image=test/elephant_01.jpg
標識自定圖片
圖片位置
請將圖片置於專案中 data\images 目錄之下
標識工具 – labelme
請於dos模式下,執行系統級 pip install labelme,下載好執行 labelme即可開啟 GUI 程式。選取 open dir選取 data\images。標識後儲存 json檔到 data\images 目錄之下,此目錄就會多出 cat_1.json, cat_2.json……。
轉成 coco格式
在 data目錄下,新增label.txt檔案,內容如下
__ignore__
_background_
cat
dog
elephant
pig
tiger
然後於專案之下新增 labelme2coco.py,將labelme格式轉成coco格式,代碼如下
#!/usr/bin/env python
import collections
import datetime
import glob
import json
import os
import os.path as osp
import sys
import uuid
import imgviz
import numpy as np
import labelme
import shutil
try:
    import pycocotools.mask
except ImportError:
    print("Please install pycocotools:\n\n    pip install pycocotools\n")
    sys.exit(1)
def main():
    output_dir='data/output'
    input_dir='data/images'
    labels='data/label.txt'
    if os.path.exists(output_dir):
        shutil.rmtree(output_dir)
    os.makedirs(output_dir)
    os.makedirs(os.path.join(output_dir, "JPEGImages"))
    os.makedirs(osp.join(output_dir, "Visualization"))
    print("Creating dataset:", output_dir)
    now = datetime.datetime.now()
    data = dict(
        info=dict(
            description=None,
            url=None,
            version=None,
            year=now.year,
            contributor=None,
            date_created=now.strftime("%Y-%m-%d %H:%M:%S.%f"),
        ),
        licenses=[dict(url=None, id=0, name=None,)],
        images=[
            # license, url, file_name, height, width, date_captured, id
        ],
        type="instances",
        annotations=[
            # segmentation, area, iscrowd, image_id, bbox, category_id, id
        ],
        categories=[
            # supercategory, id, name
        ],
    )

    class_name_to_id = {}
    for i, line in enumerate(open(labels).readlines()):
        class_id = i - 1  # starts with -1
        class_name = line.strip()
        if class_id == -1:
            assert class_name == "__ignore__"
            continue
        class_name_to_id[class_name] = class_id
        data["categories"].append(
            dict(supercategory=None, id=class_id, name=class_name,)
        )

    out_ann_file = osp.join(output_dir, "annotations.json")
    label_files = glob.glob(os.path.join(input_dir, "*.json"))
    for image_id, filename in enumerate(label_files):
        print("Generating dataset from:", filename)

        label_file = labelme.LabelFile(filename=filename)

        base = osp.splitext(osp.basename(filename))[0]
        out_img_file = osp.join(output_dir, "JPEGImages", base + ".jpg")

        img = labelme.utils.img_data_to_arr(label_file.imageData)
        imgviz.io.imsave(out_img_file, img)
        data["images"].append(
            dict(
                license=0,
                url=None,
                file_name=osp.relpath(out_img_file, osp.dirname(out_ann_file)),
                height=img.shape[0],
                width=img.shape[1],
                date_captured=None,
                id=image_id,
            )
        )

        masks = {}  # for area
        segmentations = collections.defaultdict(list)  # for segmentation
        for shape in label_file.shapes:
            points = shape["points"]
            label = shape["label"]
            group_id = shape.get("group_id")
            shape_type = shape.get("shape_type", "polygon")
            mask = labelme.utils.shape_to_mask(
                img.shape[:2], points, shape_type
            )

            if group_id is None:
                group_id = uuid.uuid1()

            instance = (label, group_id)

            if instance in masks:
                masks[instance] = masks[instance] | mask
            else:
                masks[instance] = mask

            if shape_type == "rectangle":
                (x1, y1), (x2, y2) = points
                x1, x2 = sorted([x1, x2])
                y1, y2 = sorted([y1, y2])
                points = [x1, y1, x2, y1, x2, y2, x1, y2]
            if shape_type == "circle":
                (x1, y1), (x2, y2) = points
                r = np.linalg.norm([x2 - x1, y2 - y1])
                # r(1-cos(a/2))<x, a=2*pi/N => N>pi/arccos(1-x/r)
                # x: tolerance of the gap between the arc and the line segment
                n_points_circle = max(int(np.pi / np.arccos(1 - 1 / r)), 12)
                i = np.arange(n_points_circle)
                x = x1 + r * np.sin(2 * np.pi / n_points_circle * i)
                y = y1 + r * np.cos(2 * np.pi / n_points_circle * i)
                points = np.stack((x, y), axis=1).flatten().tolist()
            else:
                points = np.asarray(points).flatten().tolist()

            segmentations[instance].append(points)
        segmentations = dict(segmentations)

        for instance, mask in masks.items():
            cls_name, group_id = instance
            if cls_name not in class_name_to_id:
                continue
            cls_id = class_name_to_id[cls_name]

            mask = np.asfortranarray(mask.astype(np.uint8))
            mask = pycocotools.mask.encode(mask)
            area = float(pycocotools.mask.area(mask))
            bbox = pycocotools.mask.toBbox(mask).flatten().tolist()

            data["annotations"].append(
                dict(
                    id=len(data["annotations"]),
                    image_id=image_id,
                    category_id=cls_id,
                    segmentation=segmentations[instance],
                    area=area,
                    bbox=bbox,
                    iscrowd=0,
                )
            )

        viz = img
        if masks:
            labels, captions, masks = zip(
                *[
                    (class_name_to_id[cnm], cnm, msk)
                    for (cnm, gid), msk in masks.items()
                    if cnm in class_name_to_id
                ]
            )
            viz = imgviz.instances2rgb(
                image=img,
                labels=labels,
                masks=masks,
                captions=captions,
                font_size=15,
                line_width=2,
            )
        out_viz_file = osp.join(
            output_dir, "Visualization", base + ".jpg"
        )
        imgviz.io.imsave(out_viz_file, viz)

    with open(out_ann_file, "w") as f:
        json.dump(data, f)
if __name__ == "__main__":
    main()
執行後,會在專案data的目錄下,產生output目錄,裏面有JPEGImages,Visualization二個目錄及annotations.json。此三個為後續訓練重要的資料。
修改 data/config.py
config.py 為訓練模型的設定檔。請在 config.py 的最後加入如下代碼
#底下是copy 108~129行,然後再進行修改
animal_dataset = dataset_base.copy({
    'name': 'Animal Dataset',
    'train_images': './data/output/',
    'train_info': './data/output/annotations.json',
    'valid_images': './data/output/',
    'valid_info': './data/output/annotations.json',
    'has_gt': True,
    'class_names': ('cat', 'dog', 'elephant', 'pig', 'tiger'),
    'label_map': {1:1, 2:2, 3:3, 4:4, 5:5}
})

#底下是 copy  656~704行,再進行修改
animal_config = coco_base_config.copy({
    'name': 'yolact_base',

    # Dataset stuff
    'dataset': animal_dataset,
    'num_classes': len(animal_dataset.class_names) + 1, #class數量 + 1

    # Image Size
    'max_size': 550,

    # Training params
    'lr_steps': (2800, 6000, 7000, 7500),
    'max_iter': 8000,

    # Backbone Settings
    'backbone': resnet50_backbone.copy({
        'selected_layers': list(range(1, 4)),
        'use_pixel_scales': True,
        'preapply_sqrt': False,
        'use_square_anchors': True,  # This is for backward compatability with a bug

        'pred_aspect_ratios': [[[1, 1 / 2, 2]]] * 5,
        'pred_scales': [[24], [48], [96], [192], [384]],
    }),

    # FPN Settings
    'fpn': fpn_base.copy({
        'use_conv_downsample': True,
        'num_downsample': 2,
    }),

    # Mask Settings
    'mask_type': mask_type.lincomb,
    'mask_alpha': 6.125,
    'mask_proto_src': 0,
    'mask_proto_net': [(256, 3, {'padding': 1})] * 3 + [(None, -2, {}), (256, 3, {'padding': 1})] + [(32, 1, {})],
    'mask_proto_normalize_emulate_roi_pooling': True,

    # Other stuff
    'share_prediction_module': True,
    'extra_head_net': [(256, 3, {'padding': 1})],

    'positive_iou_threshold': 0.5,
    'negative_iou_threshold': 0.4,

    'crowd_iou_threshold': 0.7,

    'use_semantic_segmentation_loss': True,
})
下載空權重
空權重是訓練自定圖片必需使用到的檔案。請先下載 resnet50-19c8e357.pth 模型,下載後置於專案下的 weights 目錄
備份網址 : https://drive.google.com/file/d/1Jy3yCdbatgXa5YYIdTCRrSV0S9V5g1rn/view?usp=sharing
訓練模型
訓練時會出現 RuntimeError: Expected a ‘cuda’ device type for generator but found ‘cpu’,所以需將 train.py 裏的data.DataLoader() 修改如下
data_loader = data.DataLoader(dataset, args.batch_size,
                              num_workers=args.num_workers,
                              shuffle=False, collate_fn=detection_collate,
                              pin_memory=True)
最後在命令提示視窗輸入如下指令進行訓練
python train.py --config=animal_config
訓練過程若使用nVidia RTX3080Ti顯卡需要花上 5小時30分57秒。訓練完後,會在weights下產生 yolact_base_7999_8000.pth檔案。
如果中途中斷訓練,會在 weights下產生 yolact_base_xxx_xxx_interrupt.pth檔案,下次要接續訓練,只要把加入 resume 參數即可,如下所示
python train.py --config=animal_config --resume=weights/yolact_base_xxx_xxx_interrupt.pth
new_train.py
官網的 train.py 為訓練模型的原始碼,但寫的實在是太亂,所以本人新增 new_train.py 。此檔調用官網的 train.py 檔,所以不需理解官網的邏輯。訓練中途若有中斷,可以設定 args.resume參數,指定上一次中斷點的權重檔案,就可由中斷點開始訓練,不需重頭開始。
import time
from data import set_cfg
from train import train, args, replace

if __name__=='__main__':
    args.save_folder = 'weights/'
    # 中途有中斷訓練的話,從 xxx.pth 開始訓練
    # args.resume=f'{args.save_folder}/yolact_base_xxx_xxx_interrupt.pth'
    args.resume = None
    args.validation_epoch = 2
    args.validation_size = 5000
    args.num_workers = 4
    args.save_interval = 10000
    args.batch_size = 8
    args.log_folder = 'logs/'
    args.cuda = True
    args.log = True
    args.interrupt = True
    args.keep_latest = False
    args.keep_latest_interval = 100000
    args.autoscale = True
    args.dataset = None

    args.lr = None
    args.decay = None
    args.gamma = None
    args.momentum = None

    args.log_gpu = False
    args.batch_alloc = None
    args.start_iter = -1
    args.config='animal_config'
    set_cfg(args.config)

    replace('lr')
    replace('decay')
    replace('gamma')
    replace('momentum')
    replace('momentum')

    t1=time.time()
    print(f'開始訓練 : {t1}....')
    train()
    t2 = time.time()
    seconds=t2-t1
    d=int(seconds//86400)
    h=int(seconds-d*86400)//3600
    m=int((seconds-d*86400-h*3600)//60)
    s=int(seconds-d*86400-h*3600-m*60)
    print(f'總共花費 : {d}天{h:02d}時{m:02d}分{s:02d}秒')
偵測自定圖片
在DOS下偵測圖片,偵測指令如下
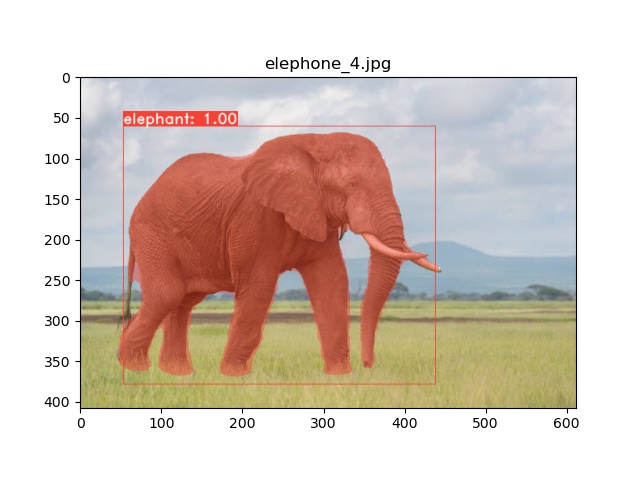
python eval.py --trained_model=weights/yolact_base_3999_8000.pth --config=animal_config --score_threshold=0.3 --top_k=100 --image=elephant_4.jpg
單圖偵測
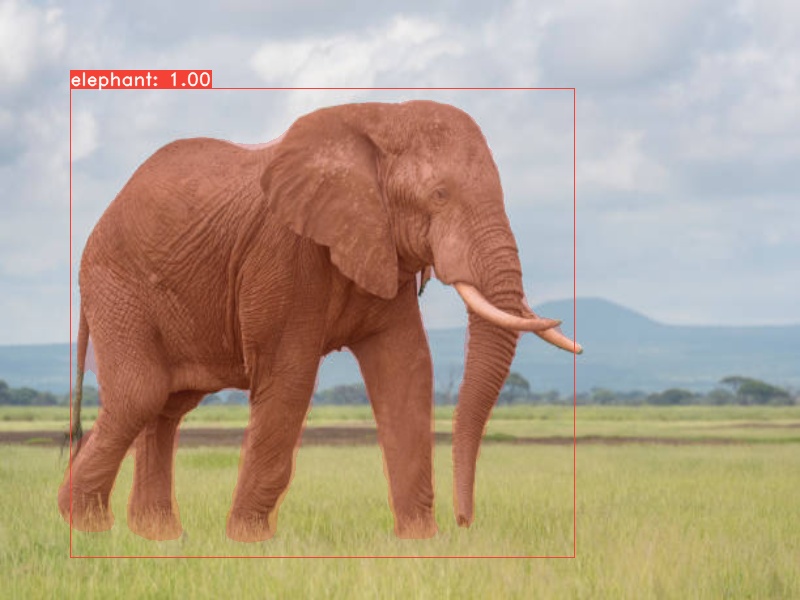
上述 eval.py 為官網所附的公版程式,可以對單圖,多圖,或影片進行偵測,約1000多行,甚難理解,且有多處寫法不是很理想。
所以本人針對單圖偵測的部份抽離出來,並加以改寫優化。請於Pycharm新增 detect.py 檔案,copy 如下代碼後,並修改如下藍色部份,直接執行即可。
import torch
from torch.backends import cudnn
from layers.output_utils import postprocess
from yolact import Yolact
import cv2, time
import numpy as np
from utils.augmentations import FastBaseTransform
from utils import timer
from data import cfg, set_cfg
from collections import defaultdict
from data import COLORS
def prep_display(dets_out, img, class_color=False, mask_alpha=0.25):
    score_threshold=0.3
    crop=False
    top_k=100
    img_gpu = img / 255.0
    h, w, _ = img.shape
    with timer.env('Postprocess'):
        save = cfg.rescore_bbox
        cfg.rescore_bbox = True
        t = postprocess(dets_out, w, h, visualize_lincomb=False,
                        crop_masks=crop,
                        score_threshold=score_threshold)
        cfg.rescore_bbox = save
    with timer.env('Copy'):
        idx = t[1].argsort(0, descending=True)[:top_k]
        if cfg.eval_mask_branch:
            masks = t[3][idx]
        classes, scores, boxes = [x[idx].cpu().numpy() for x in t[:3]]
    num_dets_to_consider = min(top_k, classes.shape[0])
    for j in range(num_dets_to_consider):
        if scores[j] < score_threshold:
            num_dets_to_consider = j
            break
    if cfg.eval_mask_branch and num_dets_to_consider > 0:
        masks = masks[:num_dets_to_consider, :, :, None]
        colors = torch.cat(
            [get_color(j, classes, class_color, on_gpu=img_gpu.device.index).view(1, 1, 1, 3) for j in range(num_dets_to_consider)], dim=0)
        masks_color = masks.repeat(1, 1, 1, 3) * colors * mask_alpha
        inv_alph_masks = masks * (-mask_alpha) + 1
        masks_color_summand = masks_color[0]
        if num_dets_to_consider > 1:
            inv_alph_cumul = inv_alph_masks[:(num_dets_to_consider - 1)].cumprod(dim=0)
            masks_color_cumul = masks_color[1:] * inv_alph_cumul
            masks_color_summand += masks_color_cumul.sum(dim=0)
        img_gpu = img_gpu * inv_alph_masks.prod(dim=0) + masks_color_summand
    img_numpy = (img_gpu * 255).byte().cpu().numpy()
    #Thomas Add
    result=[]
    display_scores=True
    for j in reversed(range(num_dets_to_consider)):
        x1, y1, x2, y2 = boxes[j, :]
        color = get_color(j, classes, class_color)
        score = scores[j]
        #繪制框線
        cv2.rectangle(img_numpy, (x1, y1), (x2, y2), color, 1)
        #顯示文字
        _class = cfg.dataset.class_names[classes[j]]
        text_str = '%s: %.2f' % (_class, score) if display_scores else _class
        #Thomas Add
        result.append([_class, score])

        font_face = cv2.FONT_HERSHEY_DUPLEX
        font_scale = 0.6
        font_thickness = 1
        text_w, text_h = cv2.getTextSize(text_str, font_face, font_scale, font_thickness)[0]
        text_pt = (x1, y1 - 3)
        text_color = [255, 255, 255]
        cv2.rectangle(img_numpy, (x1, y1), (x1 + text_w, y1 - text_h - 4), color, -1)
        cv2.putText(img_numpy, text_str, text_pt, font_face, font_scale, text_color, font_thickness,cv2.LINE_AA)
    return img_numpy, result
def get_color(j, classes, class_color, on_gpu=None):
    color_cache=defaultdict(lambda: {})
    color_idx = (classes[j] * 5 if class_color else j * 5) % len(COLORS)
    if on_gpu is not None and color_idx in color_cache[on_gpu]:
        return color_cache[on_gpu][color_idx]
    else:
        color = COLORS[color_idx]
        color = (color[2], color[1], color[0])
        if on_gpu is not None:
            color = torch.Tensor(color).to(on_gpu).float() / 255.
            color_cache[on_gpu][color_idx] = color
        return color
def detect_image(model: Yolact, image):
    model.detect.use_fast_nms = True
    model.detect.use_cross_class_nms = False
    cfg.mask_proto_debug = False

    frame = torch.from_numpy(image).cuda().float()
    batch = FastBaseTransform()(frame.unsqueeze(0))
    preds = model(batch)
    # image = prep_display(preds, frame)
    # return image
    #Thomas Add
    return prep_display(preds, frame)
def detect(model, img_path):
    with torch.no_grad():
        image = cv2.imdecode(np.fromfile(img_path, dtype=np.uint8), cv2.IMREAD_UNCHANGED)
        image = cv2.resize(image, (800, 600), interpolation=cv2.INTER_LINEAR)
        image, result=detect_image(model, image)
        return image, result
if __name__ == '__main__':
    img_path = 'elephant_4.jpg'
    config = 'animal_config'
    weights = 'weights/yolact_base_3999_8000.pth'
    set_cfg(config)
    cudnn.fastest = True
    torch.set_default_tensor_type('torch.cuda.FloatTensor')
    print('Loading model...', end='')
    model = Yolact()
    model.load_weights(weights)
    # 將模型設定為評估模式,也可以使用model.eval()
    model.train(False)
    print(' Done.')
    model = model.cuda()
    t1 = time.time()
    image, result=detect(model, img_path)
    t2 = time.time()
    print(f'偵測花費{t2-t1}秒')
    print(result)
    cv2.imshow('test', image)
    cv2.waitKey(0)
結果 :
偵測花費1.713423490524292秒
[['elephant', 0.9998498]]
QT視窗崁入Yolact
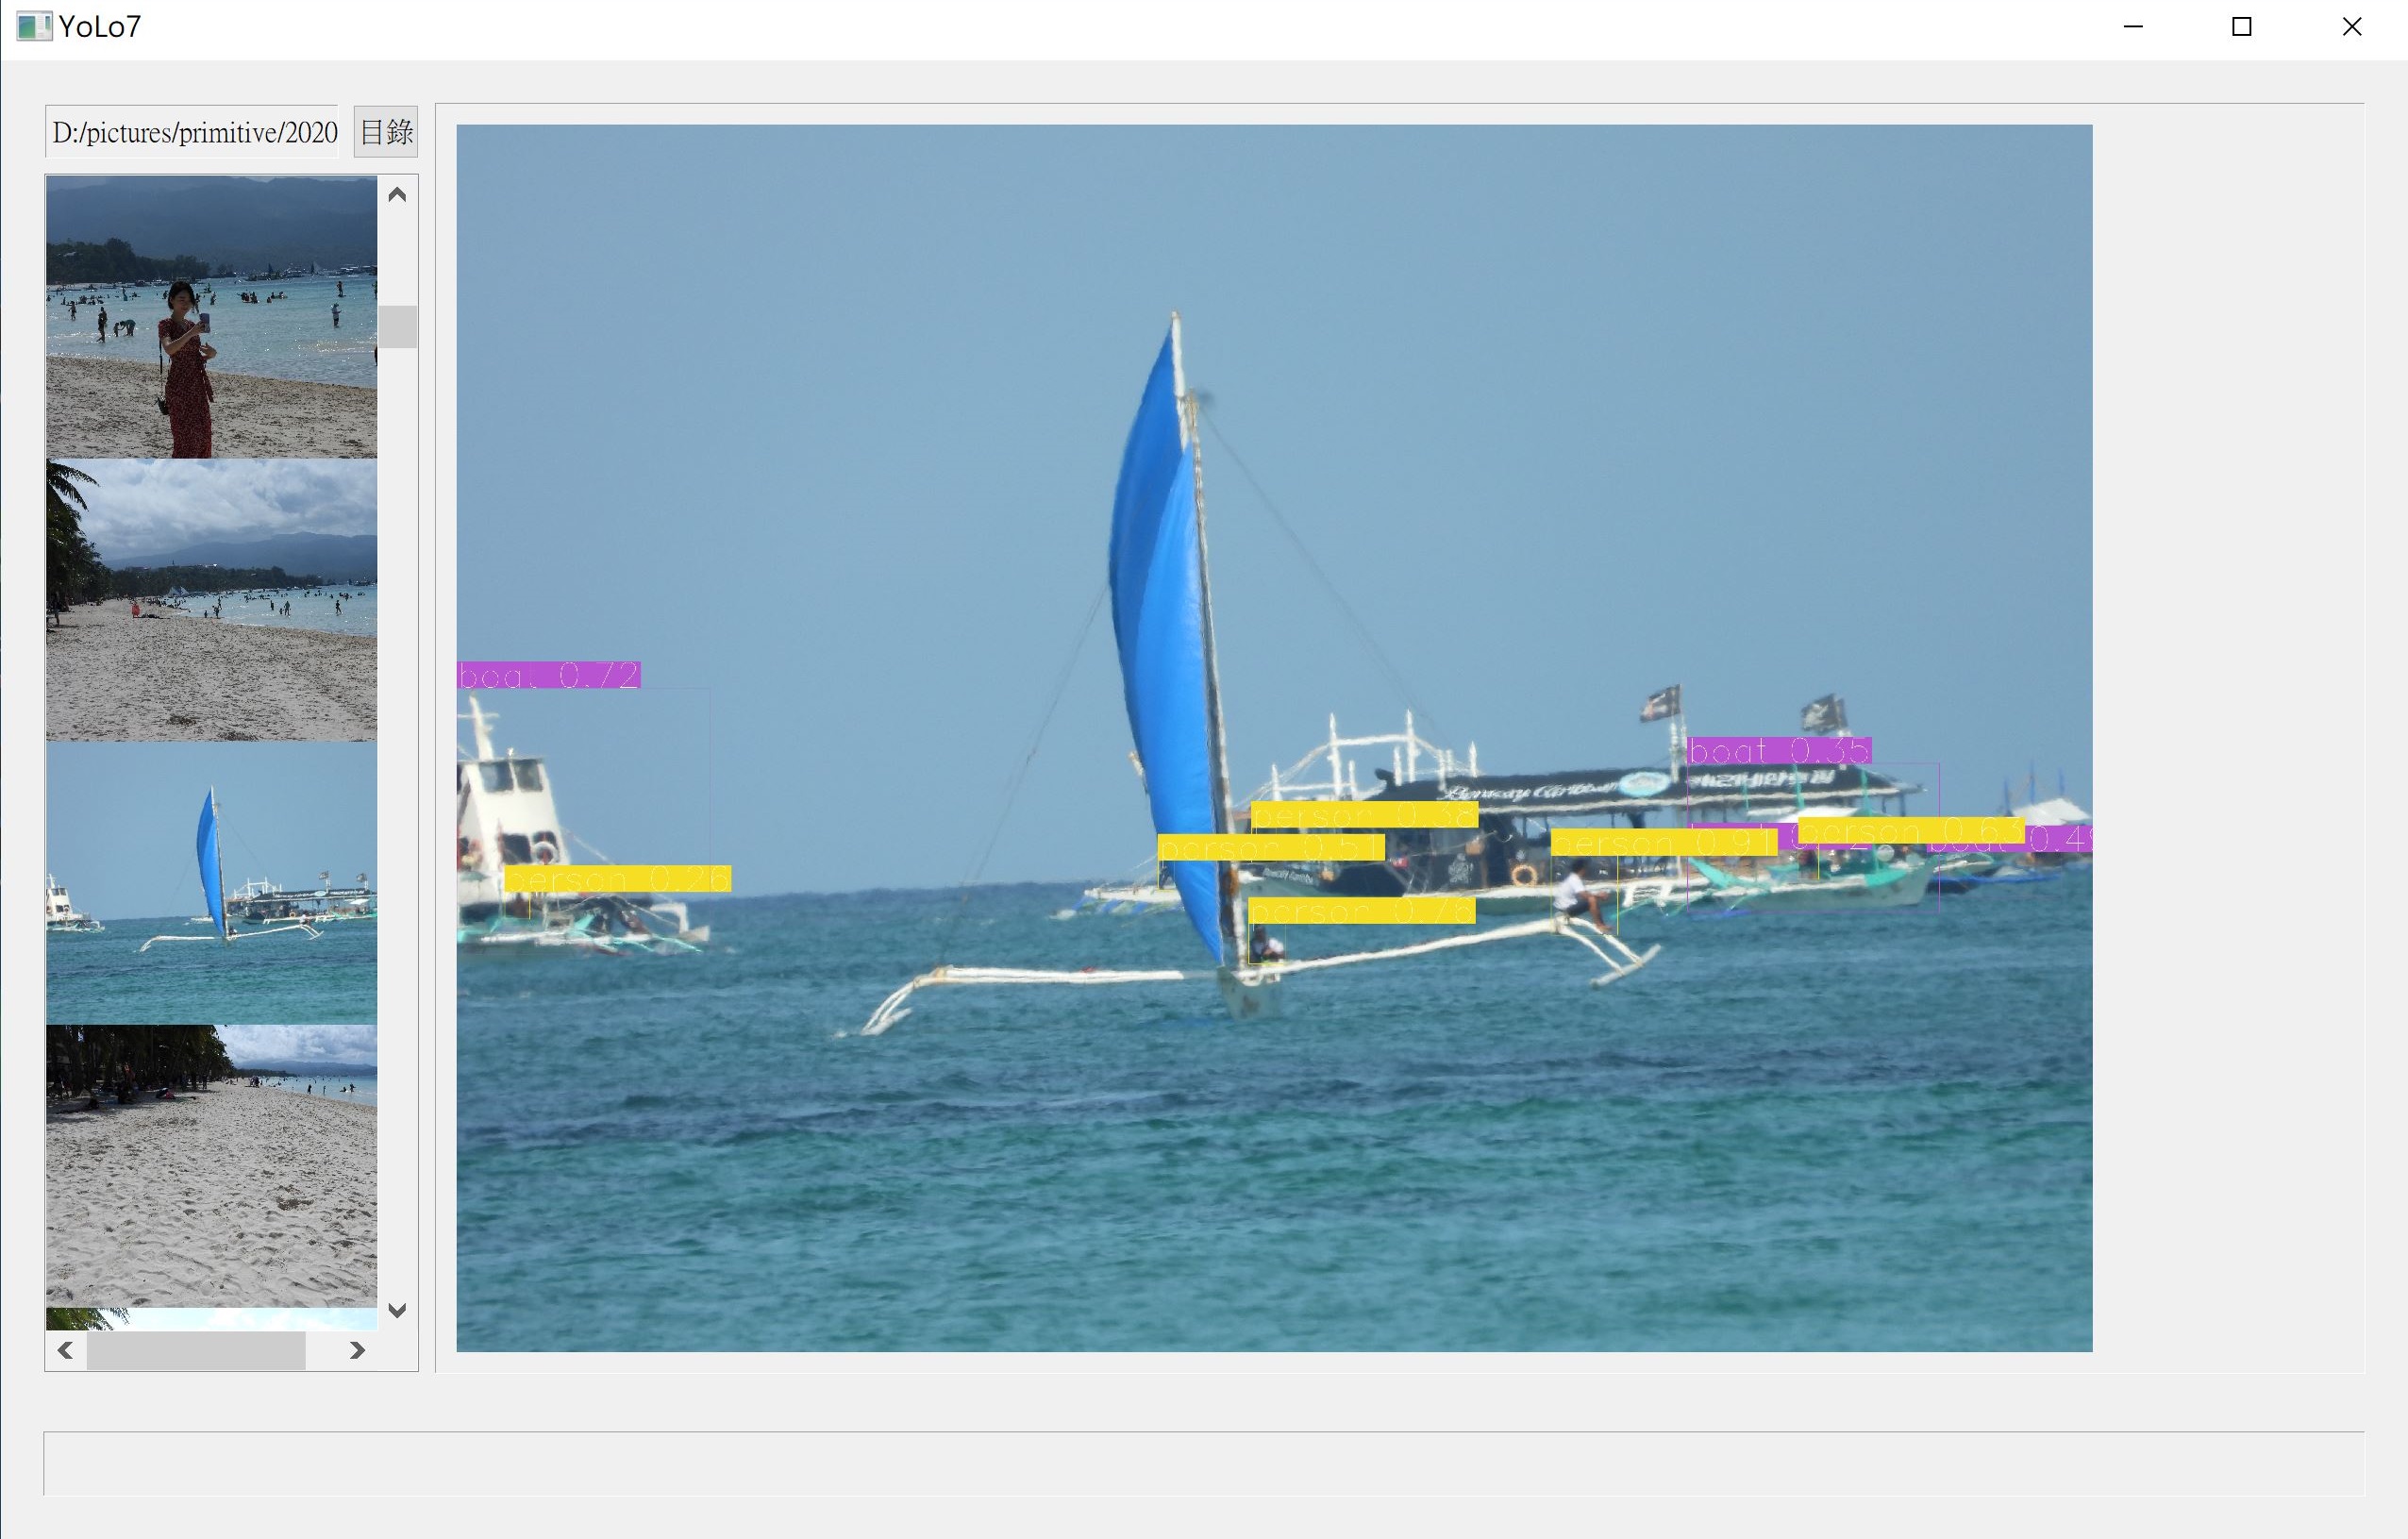
不免俗的,將偵測出來的結果顯示在視窗中。.ui 請從此處下載 : ui_mainwindow.ui。下載後請將 .ui檔置於專案中 ui 目錄下。
此視窗程式中先載入權重,然後使用上述 detect.py 檔中的 detect() 函數進行偵測。MainWindow.py主程式如下
import sys
from PyQt5.QtCore import QSize
from PyQt5.QtGui import QIcon, QPixmap, QImage
from PyQt5.QtWidgets import QMainWindow, QApplication, QFileDialog, QPushButton, QListWidgetItem
from LoadModelThread import LoadModelThread
from PictureThread import PictureThread
from detect import detect
from ui.ui_mainwindow import Ui_MainWindow
import cv2

class MainWindow(QMainWindow, Ui_MainWindow):
    def __init__(self, parent=None):
        super().__init__(parent)
        self.setupUi(self)
        self.resize(1920,1080)
        self.btnPath.clicked.connect(self.btnPath_click)
        self.lblStatus.setText("載入模型中, 請稍後.....")
        #self.loadModelThread=LoadModelThread(
        #    'weights/yolact_base_3999_8000.pth','animal_config'
        #)
        self.loadModelThread = LoadModelThread(
            'weights/yolact_resnet50_54_800000.pth','yolact_resnet50_config'
        )
        self.loadModelThread.callback.connect(self.loadModelThreadCallback)
        self.loadModelThread.start()
    def loadModelThreadCallback(self, model):
        self.model=model
        self.lblPath.setText(
            "D:/pictures/primitive/2020/20200126_Philippines_day5_Boracay"
        )
        self.path=self.lblPath.text()
        self.lblStatus.setText("")
        self.thread=PictureThread(self.path)
        self.thread.callback.connect(self.showPicture)
        self.thread.start()
    def btnPath_click(self):
        self.path = QFileDialog.getExistingDirectory()
        if self.path != '':
            self.path=self.path.replace("\\","/")
            self.lblPath.setText(self.path)
            self.listWidget.clear()
            self.thread = PictureThread(self.path)
            self.thread.callback.connect(self.showPicture)
            self.thread.start()
    def showPicture(self, pix):
        btn=QPushButton()
        btn.setIcon(QIcon(pix))
        btn.setIconSize(QSize(400,300))
        btn.tag=pix.tag
        btn.clicked.connect(self.btn_click)
        item=QListWidgetItem()
        item.setSizeHint(QSize(400,300))
        self.listWidget.addItem(item)
        self.listWidget.setItemWidget(item, btn)
    def btn_click(self):
        btn=self.sender()
        file=btn.tag.replace("\\", "/")
        img, result=detect(self.model, file)
        img = cv2.cvtColor(img, cv2.COLOR_BGR2RGB)
        pix= QPixmap(
            QImage(img, img.shape[1], img.shape[0], img.shape[1] * 3,
            QImage.Format_RGB888)
        )
        w = pix.width()
        h = pix.height()
        r = w / h
        sw = self.lblImg.width()
        sh = self.lblImg.height()
        sr = sw / sh
        if r > sr:
            pix = pix.scaled(sw, sw / r)
        else:
            pix = pix.scaled(sh * r, sh)
        self.lblImg.setPixmap(pix)

app=QApplication(sys.argv)
mainWindow=MainWindow()
mainWindow.show()
app.exec()
PictureThread.py程式如下
import os
from PyQt5.QtCore import QThread, pyqtSignal
from PyQt5.QtGui import QPixmap

class PictureThread(QThread):
    callback=pyqtSignal(object)
    def __init__(self, path, parent=None):
        super().__init__(parent)
        self.path=path
        self.runFlag=True
    def run(self):
        ls = os.listdir(self.path)
        files = []
        for l in ls:
            ll = l.lower()
            if ll.endswith('.jpg') or ll.endswith('.png'):
                files.append(f'{self.path}/{l}')
        index=0
        while index<len(files) and self.runFlag:
            pix = QPixmap(files[index])
            pix = pix.scaled(400, 300)
            pix.tag=files[index]
            self.callback.emit(pix)
            index+=1
            QThread.msleep(10)  # 要停一下, 否則UI無法立即顯示
LoadModelThread.py程式如下
import torch
from PyQt5.QtCore import QThread, pyqtSignal
from torch.backends import cudnn
from data import set_cfg
from yolact import Yolact
class LoadModelThread(QThread):
    callback=pyqtSignal(object)
    def __init__(self, weights, config,parent=None):
        super().__init__(parent)
        self.weights=weights
        self.config=config
    def run(self):
        set_cfg(self.config)
        torch.set_default_tensor_type('torch.cuda.FloatTensor')
        cudnn.fastest = True
        model = Yolact()
        model.load_weights(self.weights)
        # 將模型設定為評估模式,也可以使用model.eval()
        model.train(False)
        model = model.cuda()
        self.callback.emit(model)
結果如下
偵測影片
偵測影片指令如下
python eval.py --trained_mode=weights\yolact_resnet50_54_800000.pth --config=yolact_resnet50_config --video_multiframe=1 --top_k=15 --score_threshold=0.3 --video=temple.mp4:output.mp4